Introduction
The following article outlines the steps involved in moving a LT Auditor+ database hosted on one server to another server.
Database Supported
All version of Microsoft SQL Server 2008 R2 and above.
Process Summary
Moving the LT Auditor+ database involves the following steps:
- The current LT Auditor+ database must be backed up.
- The LT Auditor+ services on all LT Auditor+ Manager machines must be stopped.
- Detach the database from the current Microsoft SQL Server.
- Attach the database to the new Microsoft SQL server
- Configure the LT Auditor+ Manager to point to the new LT Auditor+ database
- Configure scheduled reports to run from the new database.
- Restart LT Auditor+ services on all LT Auditor+ Manager machines
- When starting the Management Console and Reporting Console, enter credentials to the new server.
Step 1 – Backing up the LT Auditor+ database
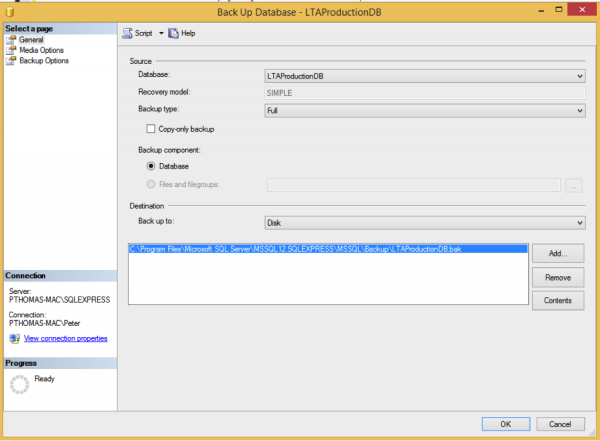
Both the Production and Archive databases should be backed up. Using the Microsoft Management Studio, a backup can be performed by:
- Right click on the database → Tasks → Back Ups.. to bring up the following windows
- You can select another destination or use the default and click OK to complete the backup.
Step 2 – Stopping LT Auditor+ Services
Access the services portal on the LT Auditor+ Manager machine and stop the service as shown below.
Step 3 – Detach database from current server
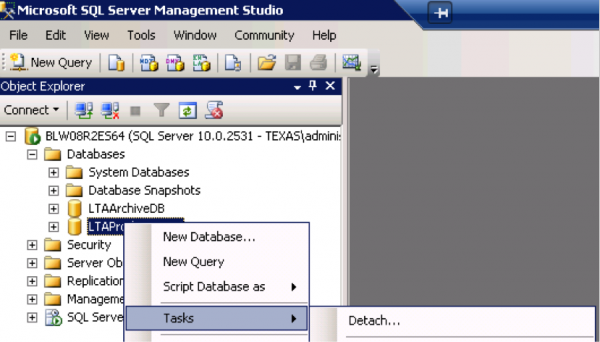
Run the Microsoft Management Studio to access the current database server and detach the database as shown below. In this example we will call the database LTAProductionDB.
- Once the DB is detached you can safely copy the files associated with the database to the new location that hosts the new database server. The files will have the extensions .MDF and .LDF as shown below:
- LT Auditor+ database files can grow very large and please ensure there is sufficient drive space on new SQL server. It can take a very long time to copy a large file so plan accordingly.
Step 4 – Attach database on new Microsoft SQL Server
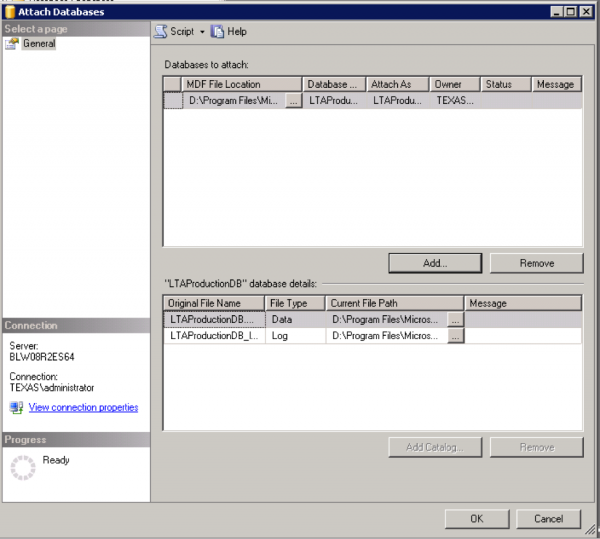
- Once both *.MDF and *.LDF files are copied they can be reattached to new SQL Server as shown below using Management Studio for SQL Server.
Step 5 – Configure the LT Auditor+ Manager to point to the new LT Auditor+ database
Due to security reasons moving a database would require a tool/utility from Blue Lance, to decrypt and encrypt configuration files that connect the LT Auditor+ Manager to the database. Please call your Blue Lance support and request for the Decrypt-Encrypt tool. This utility can only be released to authorized personnel with the company.
- Copy the following files from the folder ‘\Program Files\Blue Lance, Inc\LT Auditor+\Security Management Framework\Config\’ to a temporary folder:
- “MachineID.xml
- DBConfig.cfg”
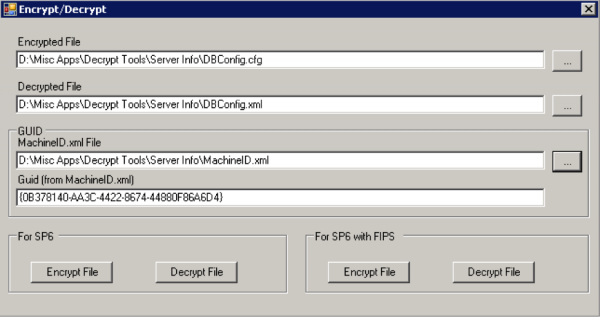
- Run the Encrypt-Decrypt tool and select the files as shown below:
- Click on Decrypt File and you will see file called DBConfig.xml. Open the file using notepad and make the changes highlighted below to put the parameters for the new Microsoft SQL Server
<MSSQL>
<ServerName>BluelabW08R2/ServerName>
<Database>LTProductionDB</Database>
<ConnectionType>0</ConnectionType>
<UserName />LTAuditor
<Password />MySecurePassword
</MSSQL>
Note: if you use Microsoft SQL Server authentication, you won’t see a User Name or Password. - Once you make the changes, click on Encrypt button and copy the two files back to the Config folder.
- Please delete the file DBConfig.xml for security reasons.
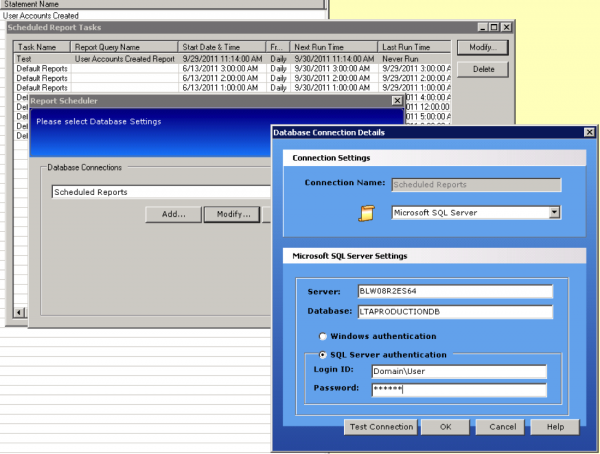
Step 6 – Configure scheduled reports to run from the new database.
If you have scheduled reports, you will need to change\modify the database settings to ensure that all scheduled jobs can run.
- Highlight a scheduled report and click on Modify.
- Select the Database Connection profile and modify the database credentials to connect to the new database.
- If all scheduled jobs use the same profile no more changes are needed otherwise make the changes on all profiles.
Step 7 – Restart LT Auditor+ services on all LT Auditor+ Manager machines
- Start the LT Auditor+ service on the LT Auditor+ Manager.
- Monitor the Windows application log for events 4013 and 4012 to ensure that audit data is rolling up into the database. Rollup typically takes place every 15 minutes.
Step 8 – When starting the Management Console and Reporting Console, enter credentials to the new server.
When launching the Management Console or Reporting Console, make sure to enter the credentials to the new Microsoft SQL Server.

